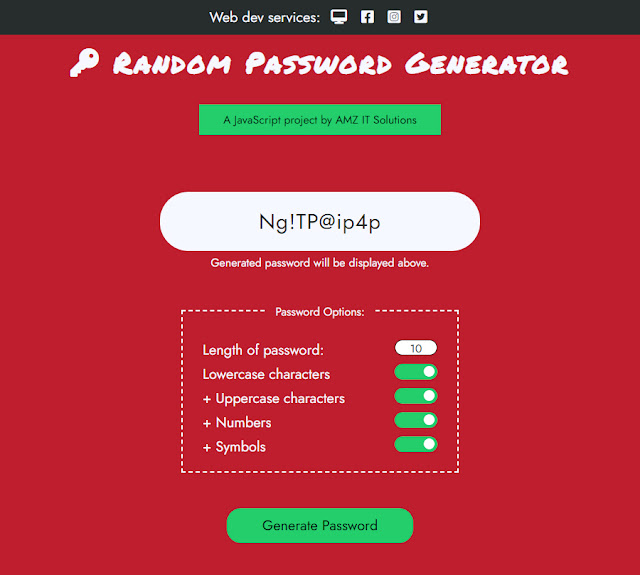
A random password generator is a program that can generate random passwords using a mixture of randomly selected characters. Since a complex and unique password is becoming a requirement almost everywhere nowadays, a random password generator would become very handy. Personally, I use a password generator which I developed myself to create passwords and unique identifiers for the databases of my web apps, server logins, and cookie names.
In this article, I’m going to share a step-by-step guide on how to develop a password generator web app using HTML, CSS, and JavaScript. You can see the full working example of this password generator at this link. This password generator web app uses two libraries: Font Awesome (CSS) and jQuery (JavaScript). The user interface is a simple layout which features (i) a box to display the generated password, (ii) a password options area for users to choose the length and characters sets to be included in the password, and (iii) a button to start generating the random password.
This step-by-step guide will focus only on the JavaScript file, so you can either create your own HTML & CSS files (with your own design) or you can download the full source codes (all HTML, CSS and JavaScript files) for this password generator web app at this link.
So, after creating your HTML and CSS files, create a new JavaScript file and load it in your HTML file. Make sure jQuery is already loaded before your newly created JavaScript file. You can refer to my index.html file from the link above if you’re unsure how it’s done.
1. Populating the dropdown (select element) with options
The first part in the JavaScript file is to create a $(document).ready() method that will dynamically populate the dropdown (select element) in the web app with options. The dropdown in the web app is for users to select the length of the password to be generated. We populate this dropdown with jQuery so that you can always change the maximum and minimum values in the options easily.
In this method, we run a loop that will iterate through the values set in the constants min_len and max_len, and at each iteration append a new option to the select element with the current value using the .append(new Option(x,x)) method. The select element in this example has an id named “passlength”; you should change that to your own id name should you use a different one.
2. Define the character sets
Next, we define the character sets using a JavaScript object. For each key-value pair, we define a key that matches the value attribute of its corresponding checkbox item in the HTML, and for the value: a string of all the possible characters that can be used to build the password.
3. Function to shuffle characters
Then we create a function to shuffle the characters in a string. In this web app, we will select characters randomly from each character set in sequence and arrange them in a string. For instance, if a password is 6 characters long, we could have 4 lowercase characters plus 2 numbers in sequence. So, we use this function to shuffle the characters so that the arrangement of the lowercase characters and numbers are mixed up.
This function will receive a string parameter – which is the full selected characters for our password – and then uses the Fisher-Yates shuffle algorithm to randomly reorder the characters in the string before returning it.
4. Generate password when button is clicked
Finally, we set up a click event listener for the “Generate Password” button. This event listener will execute a function to generate the random password. We start by declaring five variables. The first variable passmix is an array that will store the key names for the selected character sets. We start by setting the first value in the array – index [0] – as “lowercase” as that is the default and required character set for our password. Then we iterate through all the checked checkbox for the character set options and push the keyword value into the passmix array.
Next, we loop through every selected character set, one by one. At each iteration, we determine the maximum number of characters to be selected from that character set – which we assign to the variable maxcnt – leaving enough room for at least one character from every other selected character set. The exact number of characters to be selected from the current character set is assigned to the variable limit either randomly or same as the maximum number of characters if the current character set is the last one in the array passmix.
We then perform a loop according to the value set in limit, to randomly select a character from the current character set at each iteration, and push the selected character into the variable mix_tmp.
Once we have randomly selected all the required characters as per the options, the string we have in mix_tmp is sent to the function shuffleWord() to be jumbled – and the returned value is our random password which we can then display in the password-display div.
Our password generator web app is done, but you can further customize it however you want. Go ahead and try it out! If you have any comments, questions, or requests, feel free to drop me a line at naim@amz.com.my.
Naim Zulkipli
26 April 2023
Note: Original article posted here.


